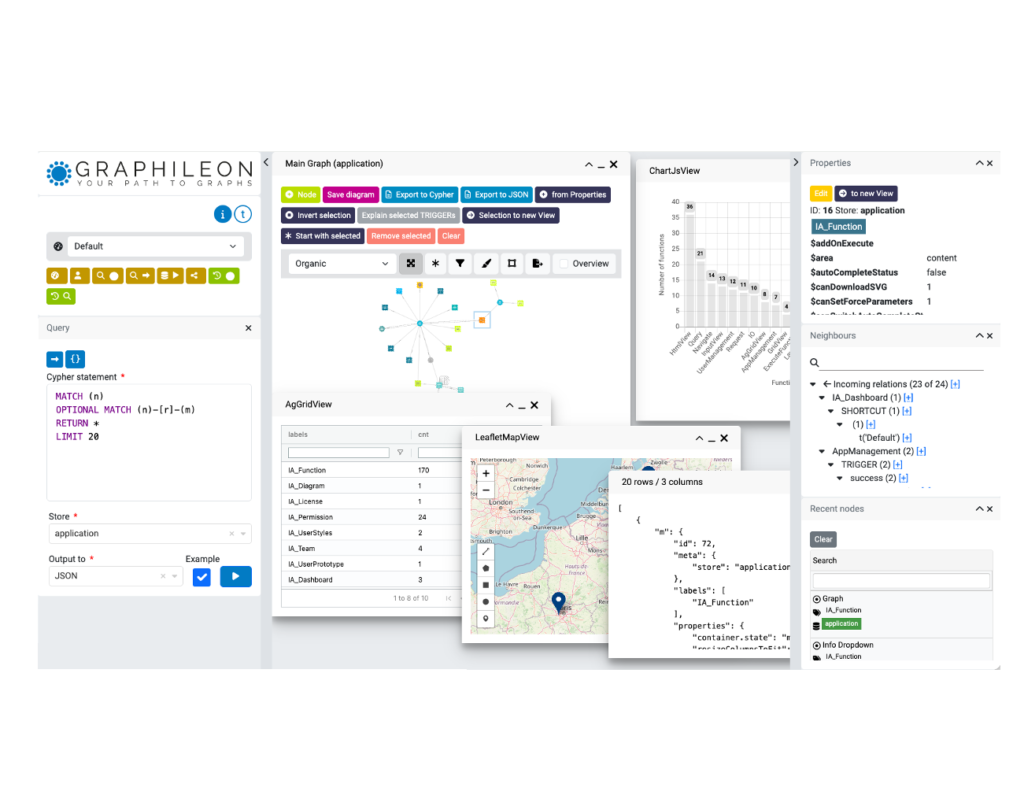
Graphileon’s default configuration, in most cases, sufficient to browse and edit the contents of your application and data stores.
However, sometimes you may want to extend or modify the Graphileon default behaviour. For instance, if you want to:
- Remove some of the default context menu options, or replace them with others;
- Replace the ‘get neighbours” functionality when double-clicking on a node, with something else;
- Have the
NetworkVieworYFilesViewreact differently to a double-click, for different types of nodes.
Re-use what is already part of the default configuration
In this blog, I describe how to do make these adjustments, starting from the default configuration. Use it as an inspiration to build better interactive applications and to re-use existing function nodes where possible. This is important if you are approaching the number of graphileons that you are allowed to use under your license,
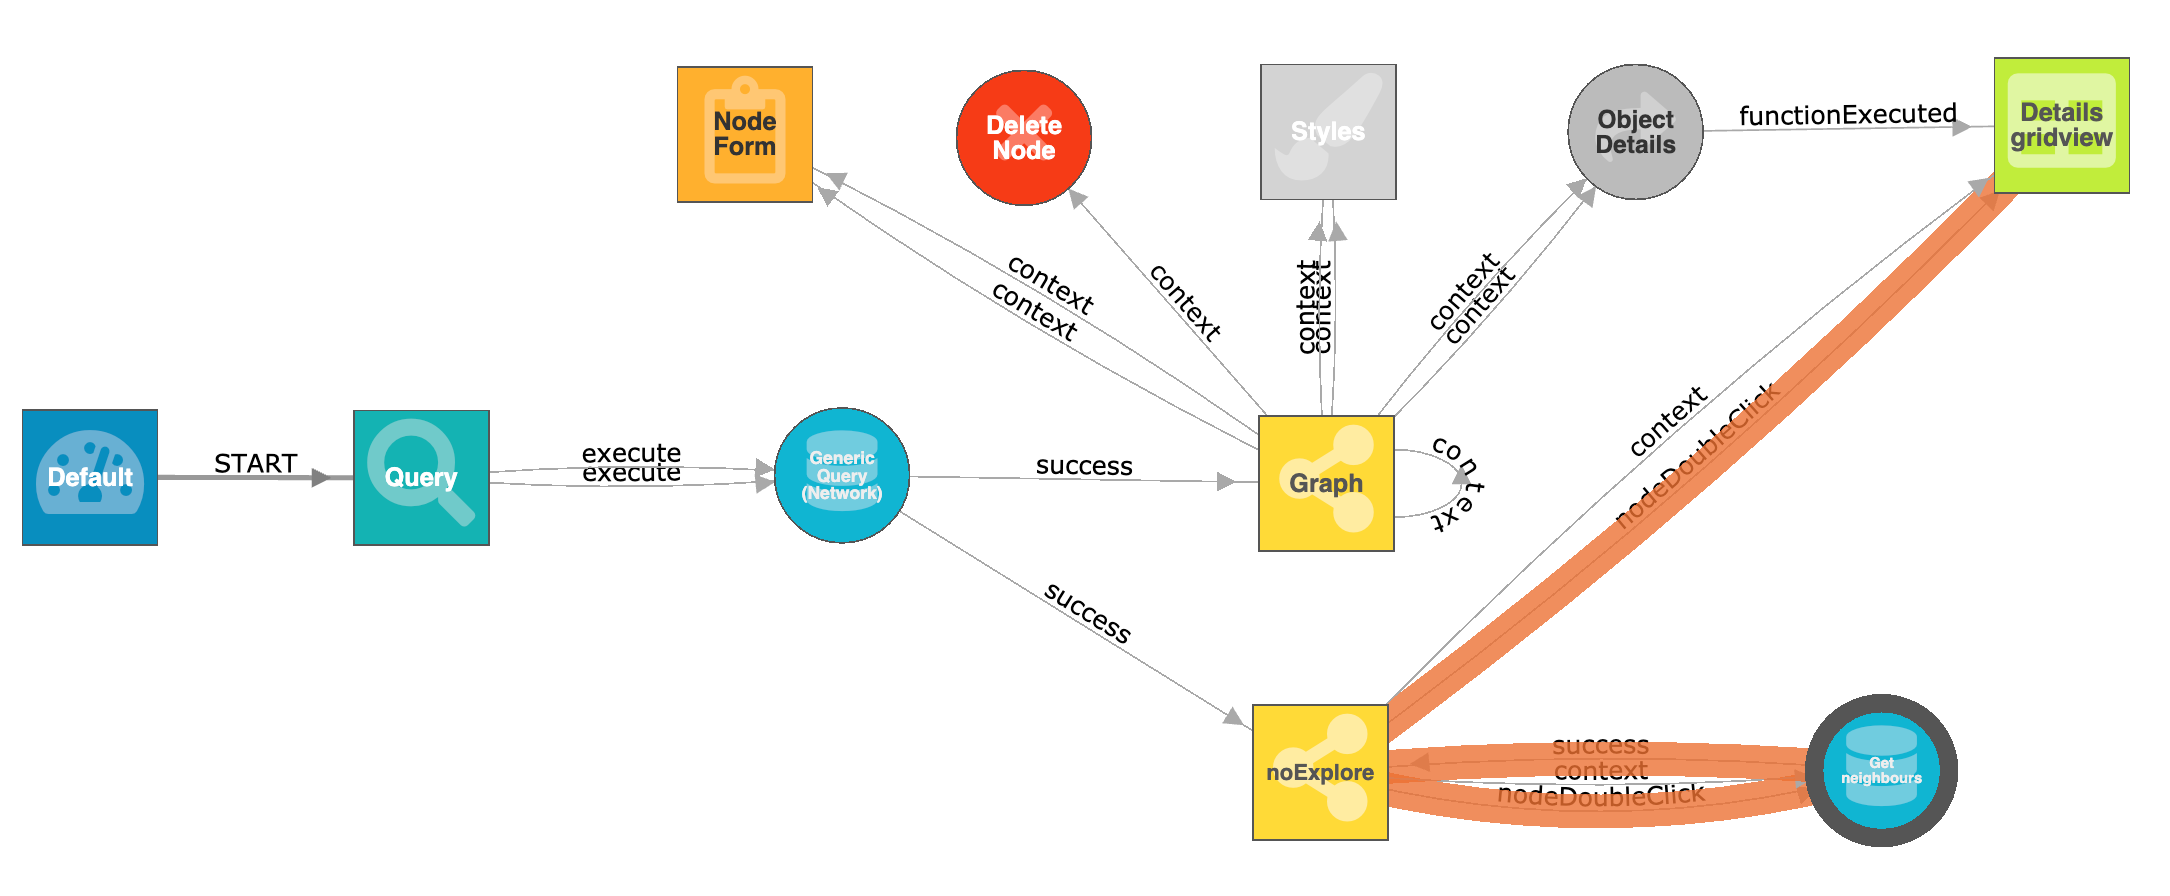
In the picture below, the nodes in the grey area are part of that default configuration. The other nodes, as well as the highlighted relationships, are the ones we are going to add or modify. As you can see, by adding only two functions (so only two graphileons), you get a lot of functionality!
At the end of this blog, there are two links to JSON files. You can use them to create a similar configuration on your own application store.

One of the functions that we add is a second NetworkView, and we name it noExplore. This one will not have the standard exploring behaviour as the NetworkView that comes with the default configuration. We also have to offer the user the possibility to route the results of the two NetworkView functions.
Setting the path
To achieve this (remember, we want to re-use functions where possible!) we add a second execute TRIGGER between the SearchView named Query, and the Generic Query (Network).

The existing execute TRIGGER has the following properties;
{
"type": "execute",                 // determines that this TRIGGER only fires when there is an execute event.
"$_path.origin": "searchView",     //
"$_path.output": "Network",        // the output (i.e. where the query result should go) is stored in the path variable.
"$_path.query": "(%).data.query",  // the query statement is stored in the path variable. It willl ater be added to the recent query list.
"$cypher": "(%).data.query",       // statement is mapped to the cypher property of the target function.
"$cypher:templating": "none",
"$gremlin": "(%).data.query",      // statement is mapped to the grenlin property of the target function.
"$sparql": "(%).data.query",       // statement is mapped to the sparql property of the target function.
"$store": "(%).data.store",        // store is mapped to the store property of the target function.
"$trigger.index": "0",             // this determines the order of the options in the output selector.
"output": "Network"                // determines that the TRIGGER only fires when the output = 'Network'.
}
We add a second TRIGGER, parallel to the first one (see the picture above), with slightly different properties (the bold ones);
{
"type": "execute",                 // determines that this TRIGGER only fires when there is an execute event.
"$_path.origin": "searchView",     //
"$_path.output": "noExplore",      // the output (i.e. where the query result should go) is stored in the path variable.
"$_path.query": "(%).data.query",  // the query statement is stored in the path variable. It willlater be added to the recent query list.
"$cypher": "(%).data.query",       // statement is mapped to the cypher property of the target function.
"$cypher:templating": "none",
"$gremlin": "(%).data.query",      // statement is mapped to the grenlin property of the target function.
"$sparql": "(%).data.query",       // statement is mapped to the sparql property of the target function.
"$store": "(%).data.store",        // store is mapped to the store property of the target function.
"$trigger.index": "1",             // this determines the order of the options in the output selector.
"output": "No explore Network"     // determines that the TRIGGER only fires when the output = 'No explore Network'.
}
This will achieve that there is an additional Output option to route the results from the SearchView in the left side-bar.
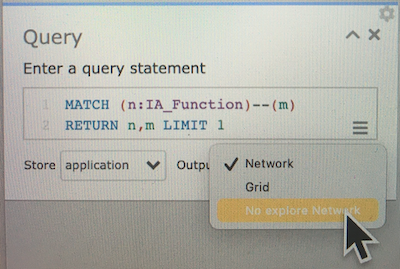
It will also set the $_path.output to a new value. We will use this value in the next step.
Adding a second NetworkView and configure the branching
The fastest way to add extend the default Graphileon configuration with a second NetworkView that has a different behaviour, is to clone the existing one. To do so, right-click on the existing one and select Clone. In the form that appears, we change the following properties;
"$container.title": "noExplore",   // sets the caption of the NetworkView.
"explorable": "false",             // overrides the default value (true).
"iaName": "noExplore",             // assigns a unique system name to the NetworkView.
"name": "noExplore"                // assigns a meaningful name to the NetworkView.
Then we have to create a TRIGGER that connects the existing Generic Query (Network) to the noExplore NetworkView, This is a so-called success TRIGGER that fires when the query is executed successfully. The new TRIGGER has the following properties;
{
"type": "success",                       // determines that this TRIGGER is executed only when "type": "success" is matched.
                                         // This happens when there is a success event.
"#nodes": "(%).processed.nodes",         // sends the nodes in the query result to the NetworkView.
"#relations": "(%).processed.relations", // sends the relationships in the query result to the NetworkView.
"$container.id": "noExplore",            // makes sure that the results are always displayed in the same container.
"$container.state": "maximized",         // maximizes the View.
"$store": "(%).meta.store",              // sets the $store of the NetworkView. This achieves that when creating new nodes
                                         // are created in the correct store by default.
"(%)._path.output==='noExplore'": "true" // determines that this TRIGGER is executed only when
                                         // (%)._path.output==='noExplore'": "true" is matched.
}

The new TRIGGER fires only when the user chooses the route the results of the query to the No explore Network. To make sure that the TRIGGER from the default configuration (The one from Generic Query (Network) to Graph) does not fire in that case, we have to add a match condition. So we add one property:
"(%)._path.output==='noExplore'": "false" // determines that this TRIGGER is NOT executed when
                                          // (%)._path.output==='noExplore'": "true" is matched.
Adding new nodeDoubleClick TRIGGERs
At this point, we have achieved that, when the user selects the No explore Network option, the results of the query are routed to a NetworkView that does not have the functionality of loading all neighbours when double-clicking a node.
But we want more. We also want to replace the double-click behaviour with something else. We can do this by manually adding TRIGGER relationships for nodeDoubleClick events. In this example, we will add two of these TRIGGER relationships. One of them will display the details of the node that the users double-clicks on. The other one mimics the default explore functionality, i.e. to load the neighbours. In this example, the details are displayed when a user double-clicks on an IA_User or IA_Function node, and the neighbours will be loaded when a IA_Dashboard node is double-clicked.
For this, we need to add the following elements to our configuration (see also picture below):
- a
nodeDoubleClickTRIGGERto the Details gridview that exists in the default configuration. - a new get Neighbours
Queryfunction. - a
nodeDoubleClickTRIGGERthat sends the parameter from the noExploreNetworkViewto theQueryfunction. - a
successTRIGGERthat sends the neighbours back to theNetworkView.
Let’s first add a TRIGGER from the noExplore NetworkView to the existing Details gridview function. We set its properties as follows:
{
"type": "nodeDoubleClick",  // determines that this TRIGGER is executed only when an event with "type": "nodeDoubleClick" is matched.
"#data.node": "(%).data",   // maps the data property of the event (%) to the data array of the grid.
"$container.id": "tv_dashboard", // assigns an id to the container in which the grid is displayed.
"$container.title": "evaluate(\r\n(%).data.labels[0]\r\n+ ' via trigger '\r\n+ (%)._triggerID\r\n)", // calculates a nice caption
                                                                                                     // for the container.
"includes(['IA_User','IA_Function'],(%).data.labels[0])": "true"  // determines that this trigger is only fired when
                                                                  // the first label of the node is IA_User or IA_Function
}
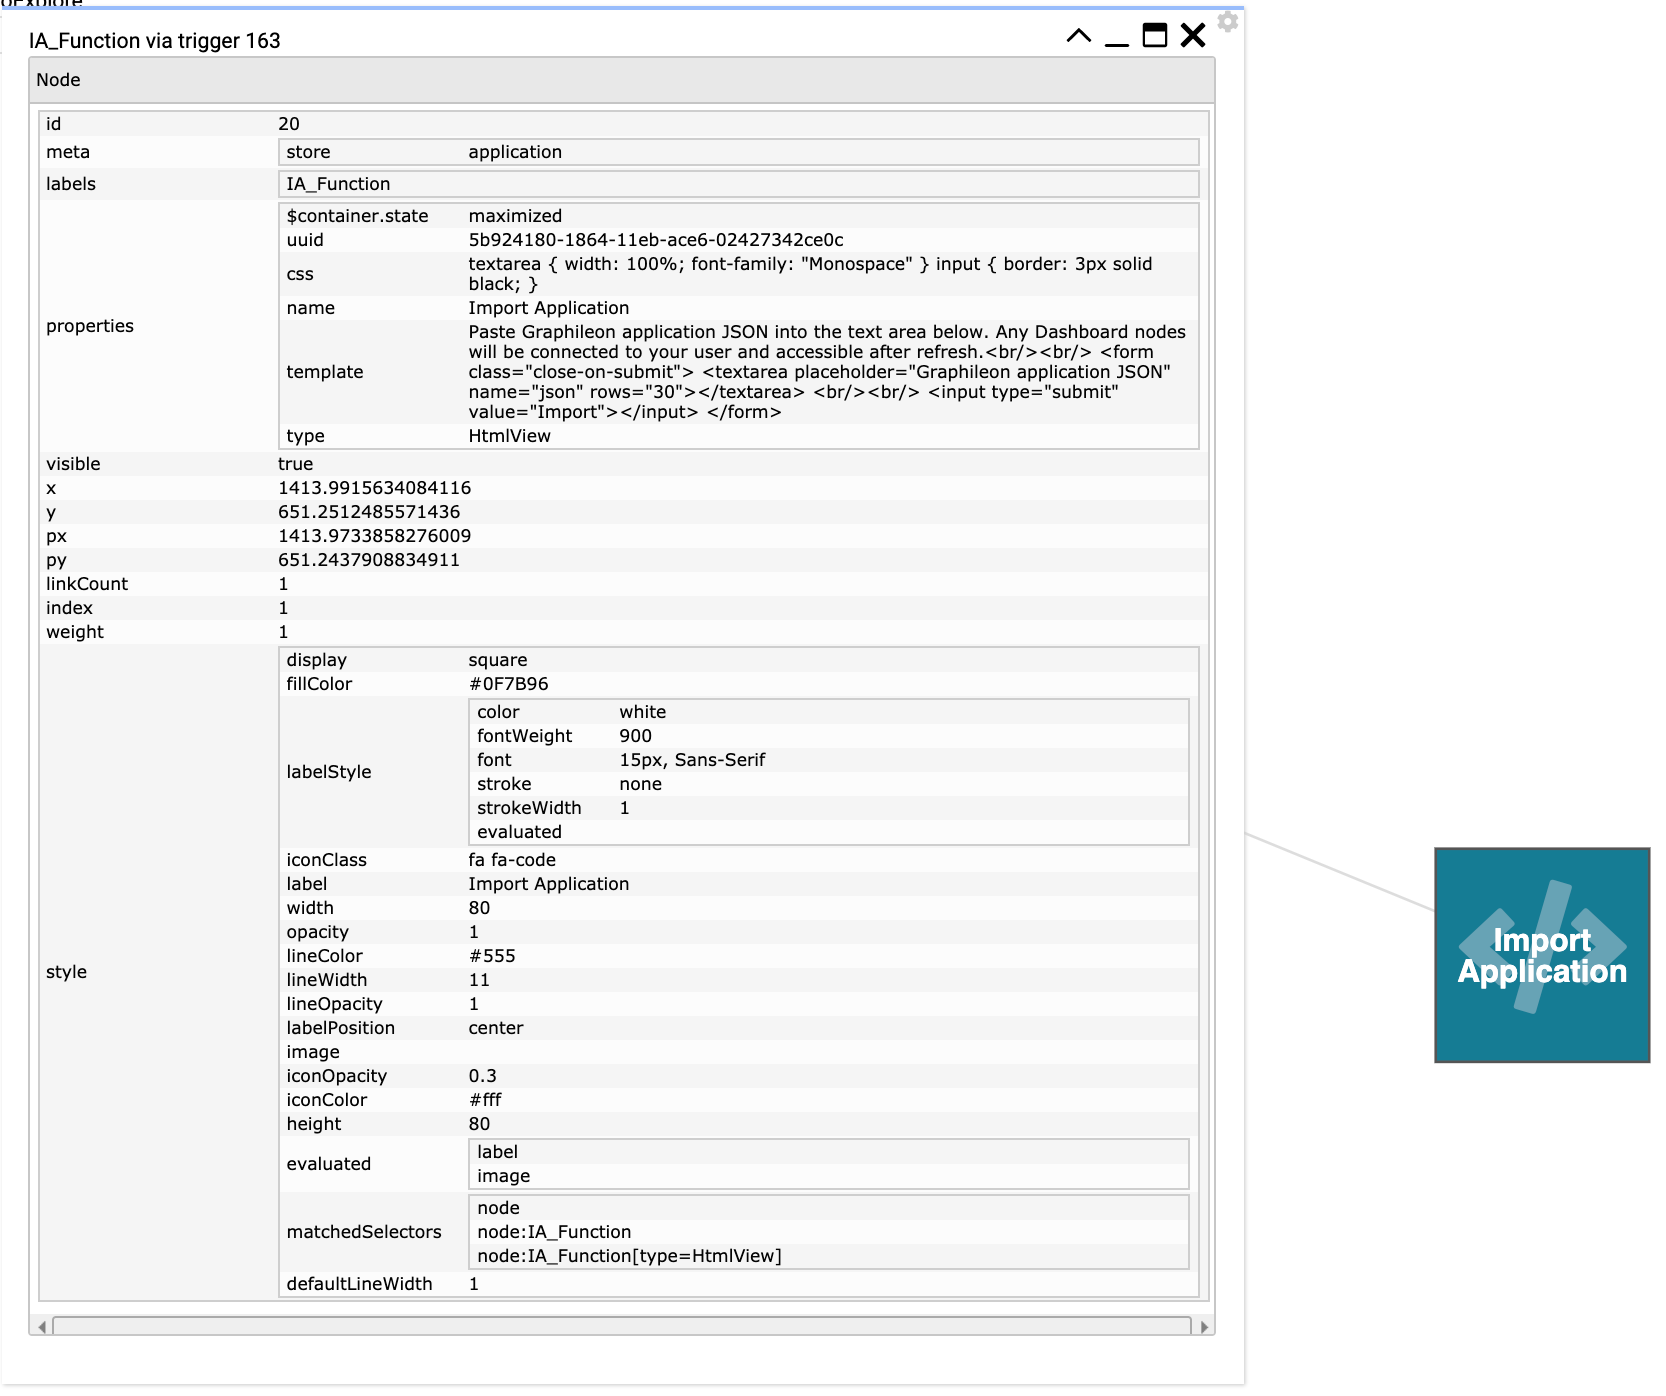
Now, when we route the results to the new NetworkView, and double-click on an IA_Function or IA_User node, Graphileon responds with a grid with the (%).data object. Note that it does return the node object as it is present in the NetworkView function, which has more information than the node as it is stored in the graph.
In the caption, it returns the label of the function and the id of the TRIGGER that was fired.
To mimic the explore functionality, we first need to add a Query function. Create an IA_Function node with these properties:
{
"type": "Query",                                                // defines the function type.
"cypher": "MATCH (n)--(m)\r\nWHERE id(n)=$id\r\nRETURN n,m",    // the cypher statement that returns all neighbours.
"name": "Get neighbours",                                       // a meaningful name.
"process": "true"                                               // determines that raw results will be transformed to nodes and relations
}
Then we create a TRIGGER from the noExplore NetworkView to Query function. Its properties are:
{
"type": "nodeDoubleClick",                     // determines that this TRIGGER is executed only at a nodeDoubleClick event.
"$params.id": "(%).data.id",                   // maps the id of the clicked node to the id parameter of the query
"$store": "(%)._function.store",               // maps the store of the NetworkView to the store property of the Query
"(%).data.labels[0]==='IA_Dashboard'": "true"  // determines that the TRIGGER only fires when
                                               // the first label of the node is IA_Dashboard
}
To send the processed results back to the noExplore NetworkView, and to add them to the existing nodes and relationships, we use a success TRIGGER from the Query back to the NetworkView:
{
"type": "success",                                      // determines that this TRIGGER is executed only at a success event.
"#_update.add.nodes": "(%).processed.nodes",            // adds the nodes array by adding the processed nodes.
"#_update.add.relations": "(%).processed.relations",    // adds the relations array by adding the processed relations.
"$_instance": "_previous"                               // sends the data to the function instance the request originated from.
}
Adding new context menu options for nodes
The noExplore NetworkView we created only has a node context menu Remove from View. We are going to extend the default Graphileon behaviour by adding two new options that, regardless of the type of node the user has selected, return the details or load the neighbours. The picture below shows the TRIGGER relationships that are needed to achieve this.

To add the option to get details, we add a TRIGGER from the noExplore NetworkView to the Details gridview, with these properties:
{
"type": "context",               // determines that this TRIGGER is executed on a context event.
"#data.node": "(%).target",      // maps the target property of the event (%) to the data array of the grid.
"$container.id": "tv_dashboard", // assigns an id to the container in which the grid is displayed.
"$container.title": "evaluate(\r\n(%).target.labels[0]\r\n+ ' via trigger '\r\n+ (%)._triggerID\r\n)",  // calculates a nice caption
                                                                                                        // for the container.
"action": "Get details",         // determines that this TRIGGER is executed if the event action is "Get details".
                                 // it also sets the text for the context menu option.
"menu": "node"                   // determines that this TRIGGER is executed if the event menu is "node".
}
To add the Load neighbours context menu option, another TRIGGER is added from the explore NetworkView to the Get neighbours Query, with these properties:
{
"type": "context",                  // determines that this TRIGGER is executed on a context event.
"$params.id": "(%).target.id",
"$store": "(%)._function.store",
"action": "Load neighbours",        // determines that this TRIGGER is executed if the event action is "Load neighbours".
                                    // it also sets the text for the context menu option.
"menu": "node"                      // determines that this TRIGGER is executed if the event menu is "node".
}
Downloading the configuration
This file contains, as JSON data, the configuration that is described above. Before importing it (using the blue “Import Application” shortcut that comes with the default configuration), make sure you have your current configuration properly backed up, as the import may affect it, depending on whether you have modified or extended the default configuration already.
In case you have a Graphileon Personal Edition that uses YFilesViews (or a server or AWS edition with a YFilesView license, use GraphileonExtension_20210302_changedBehaviourYFV. Otherwise, use GraphileonExtension_20210302_changedBehaviourNV.
If you are not using the Import Application functionality, you can modify the configuration manually and copy & paste the properties from the JSON file to the JSON tab in the edit node and edit relation forms in Graphileon.

 Docker
 Cloud
Cloud